
Note: Aircraft need to be added using a web browser, they cannot be added via the app.
TIP: Having your aircraft logbooks handy throughout this process will make it simple to retrieve details such as the starting hours for your logbook, the number of landings, serial numbers, etc. If you have these documents within reach the setup process should take less than 10 minutes.
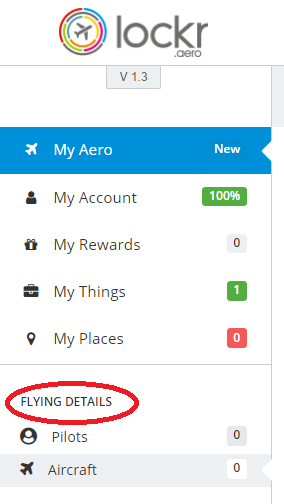
Under “FLYING DETAILS” – Select/click on the Aircraft menu item.
On the right hand side there are three tabs: Aircraft, Engine, and Propeller.
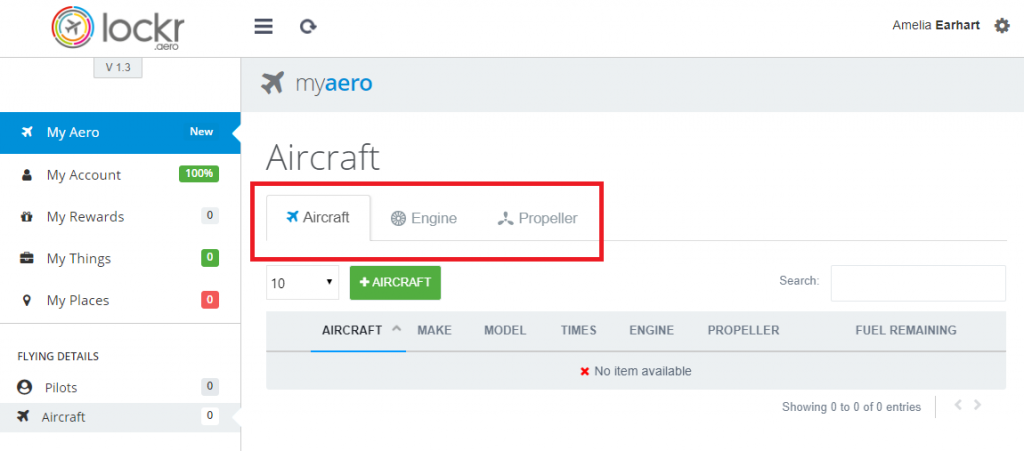
If you are not already on the “Aircraft” tab select/click the “Aircraft” tab, and then select/click the “+Aircraft” button
Under the heading “Add new Aircraft” you will see there are several tabs: Basic, Fields, Features, Charges, Sharing, Weight, Service, Transfer. Some items on the “Basic” and “Fields” tab are mandatory while items in the other tabs are optional.
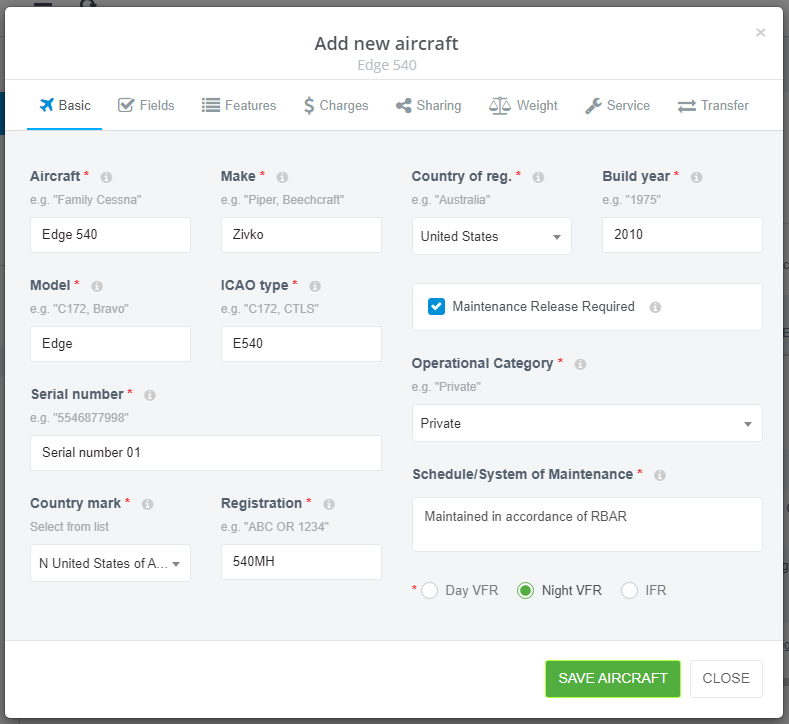
First step: complete the Basic details for your aircraft. Be sure to enter values into all fields marked with a red star (*) or you won’t be able to save the aircraft.
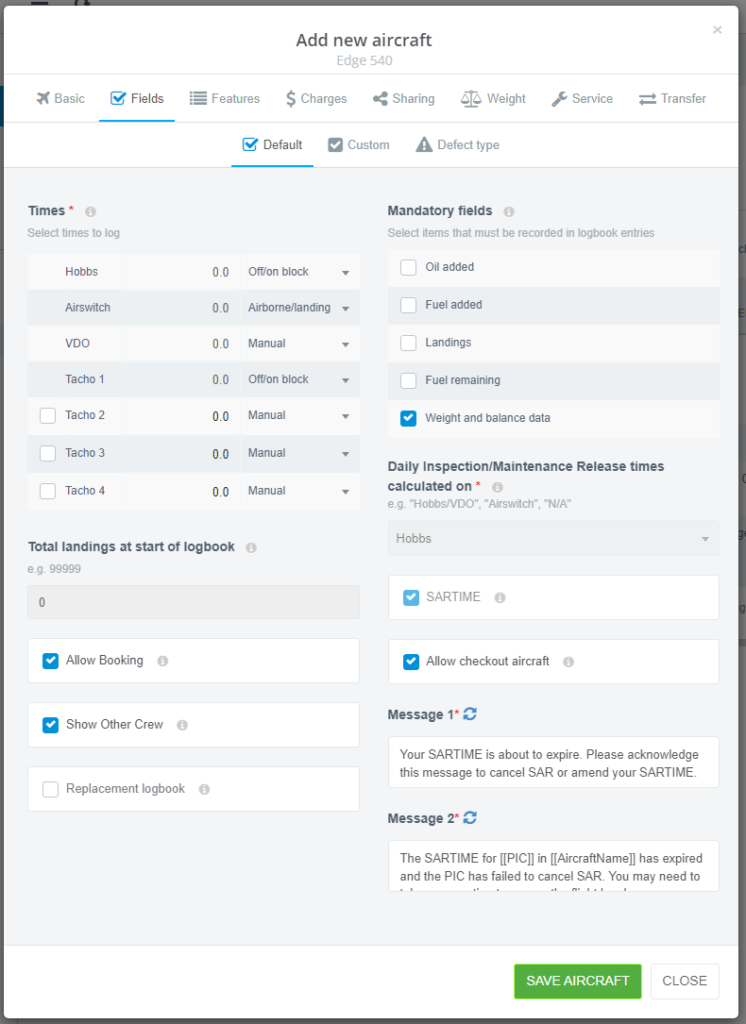
Next select/click the “Fields” tab underneath the heading “Add new aircraft”.
Some tips/pointers:
- Times: is for your aircraft and component hours. You need to choose one at a minimum but can choose more.
- Set these times to the same value as the timers in your aircraft when you plan to start this logbook.
- These times will also be used to calculate hours for your engine and propeller.
- Mandatory fields: if one or more of these are selected, you will be prompted for these fields when you complete your aircraft log book. If none of these are selected then these items will be optional and you will not be prompted to enter them in. If you change your mind in the future you can come back to this screen and select/click the option(s) you want.
- Daily inspection/Maintenance release times calculated on: this is the timer that you wish to use when recording daily inspections.
Finally select/click the “Features” tab.
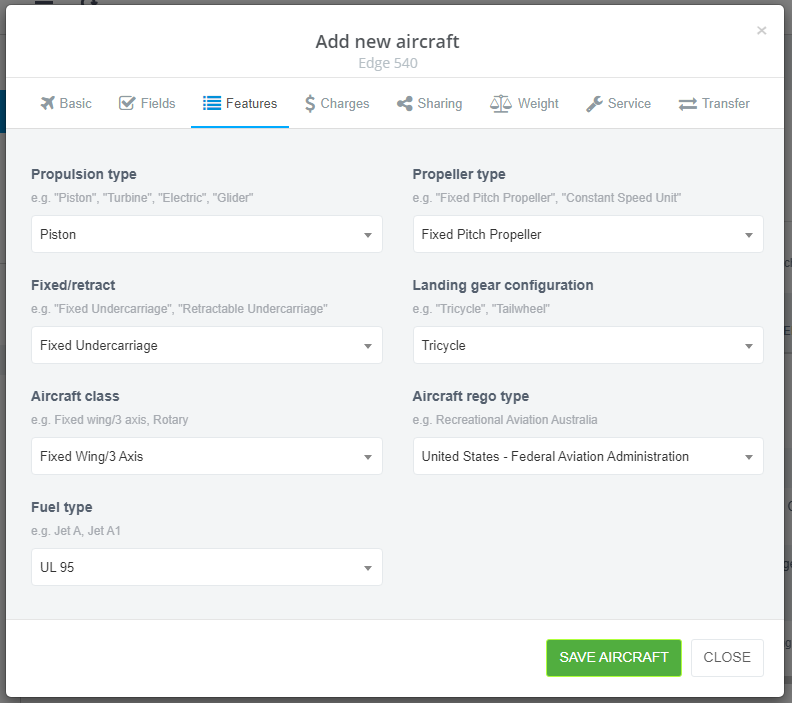
On this screen you can select the design features that you want to record for each flight that you take with this aircraft. You can also add the class of aircraft, where it is registered and the fuel type it uses.
Before you leave, don’t forget to select/click on the “SAVE AIRCRAFT“ button.
Your aircraft has now been created!
Note: You can also advanced features of the aircraft in this same setup screen. See other user guide articles to learn how to do this.